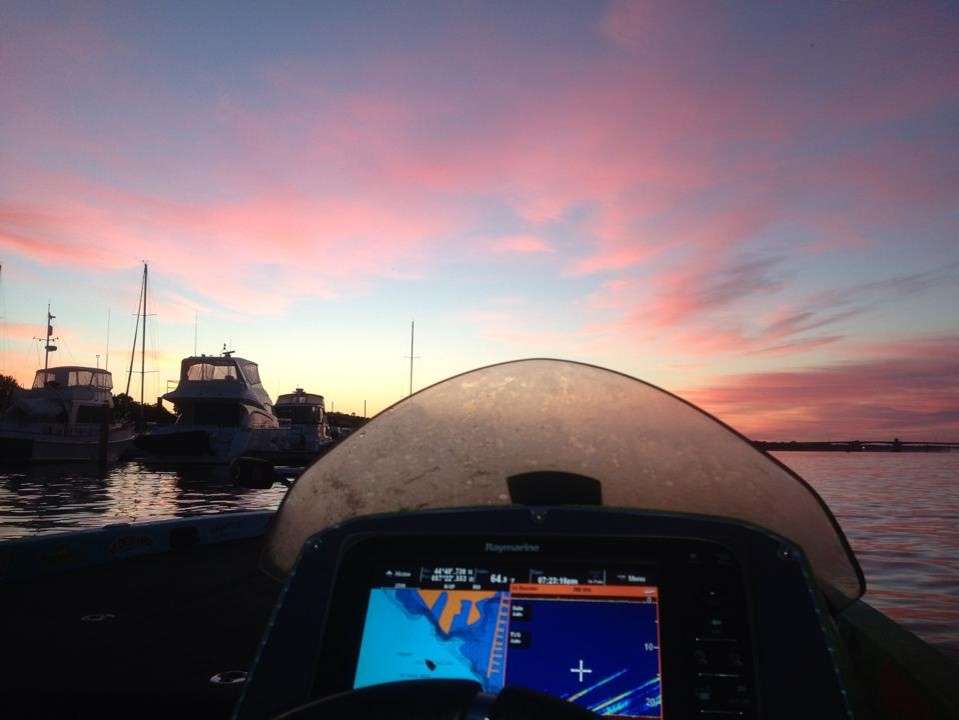
Now that summer is here, many fish are leaving the bank, heading for offshore structure. And that’s when skills with your electronics come into play.
Whether it’s brushpiles, stump rows, muscle beds or open water grass, black bass will search out the best available cover away from the bank, on any given body of water — particularly as it relates to key structural features. That’s true for manmade reservoirs and natural lakes alike.
The key is finding the right cover and depth. Once you have that, then it’s only a matter of searching for similar areas at that same depth zone to develop a pattern.
There’s a way of narrowing the search, too … through a few simple touches of the keypad on your electronics. And we will get to that. First, let’s consider where to start looking.
Where Shallow Meets Deep
Among the best places to explore are where shallow drops fall quickly into deep water — where the contour lines on your chart are close together.
Not only are shallow drops easy to locate, they’re easy to scan with your electronics too — by simply idling along the drop off and looking for any type of cover or irregularity that could hold a school of bass. In fact, in many instances, you’re likely to see the fish before recognizing what it is they’re relating to.
Once you figure out the right cover and depth, then it’s just a matter of duplicating the situation to find more. That’s “pattern fishing,” and here’s how your electronics can make the task even simpler.
Blue Fading to White
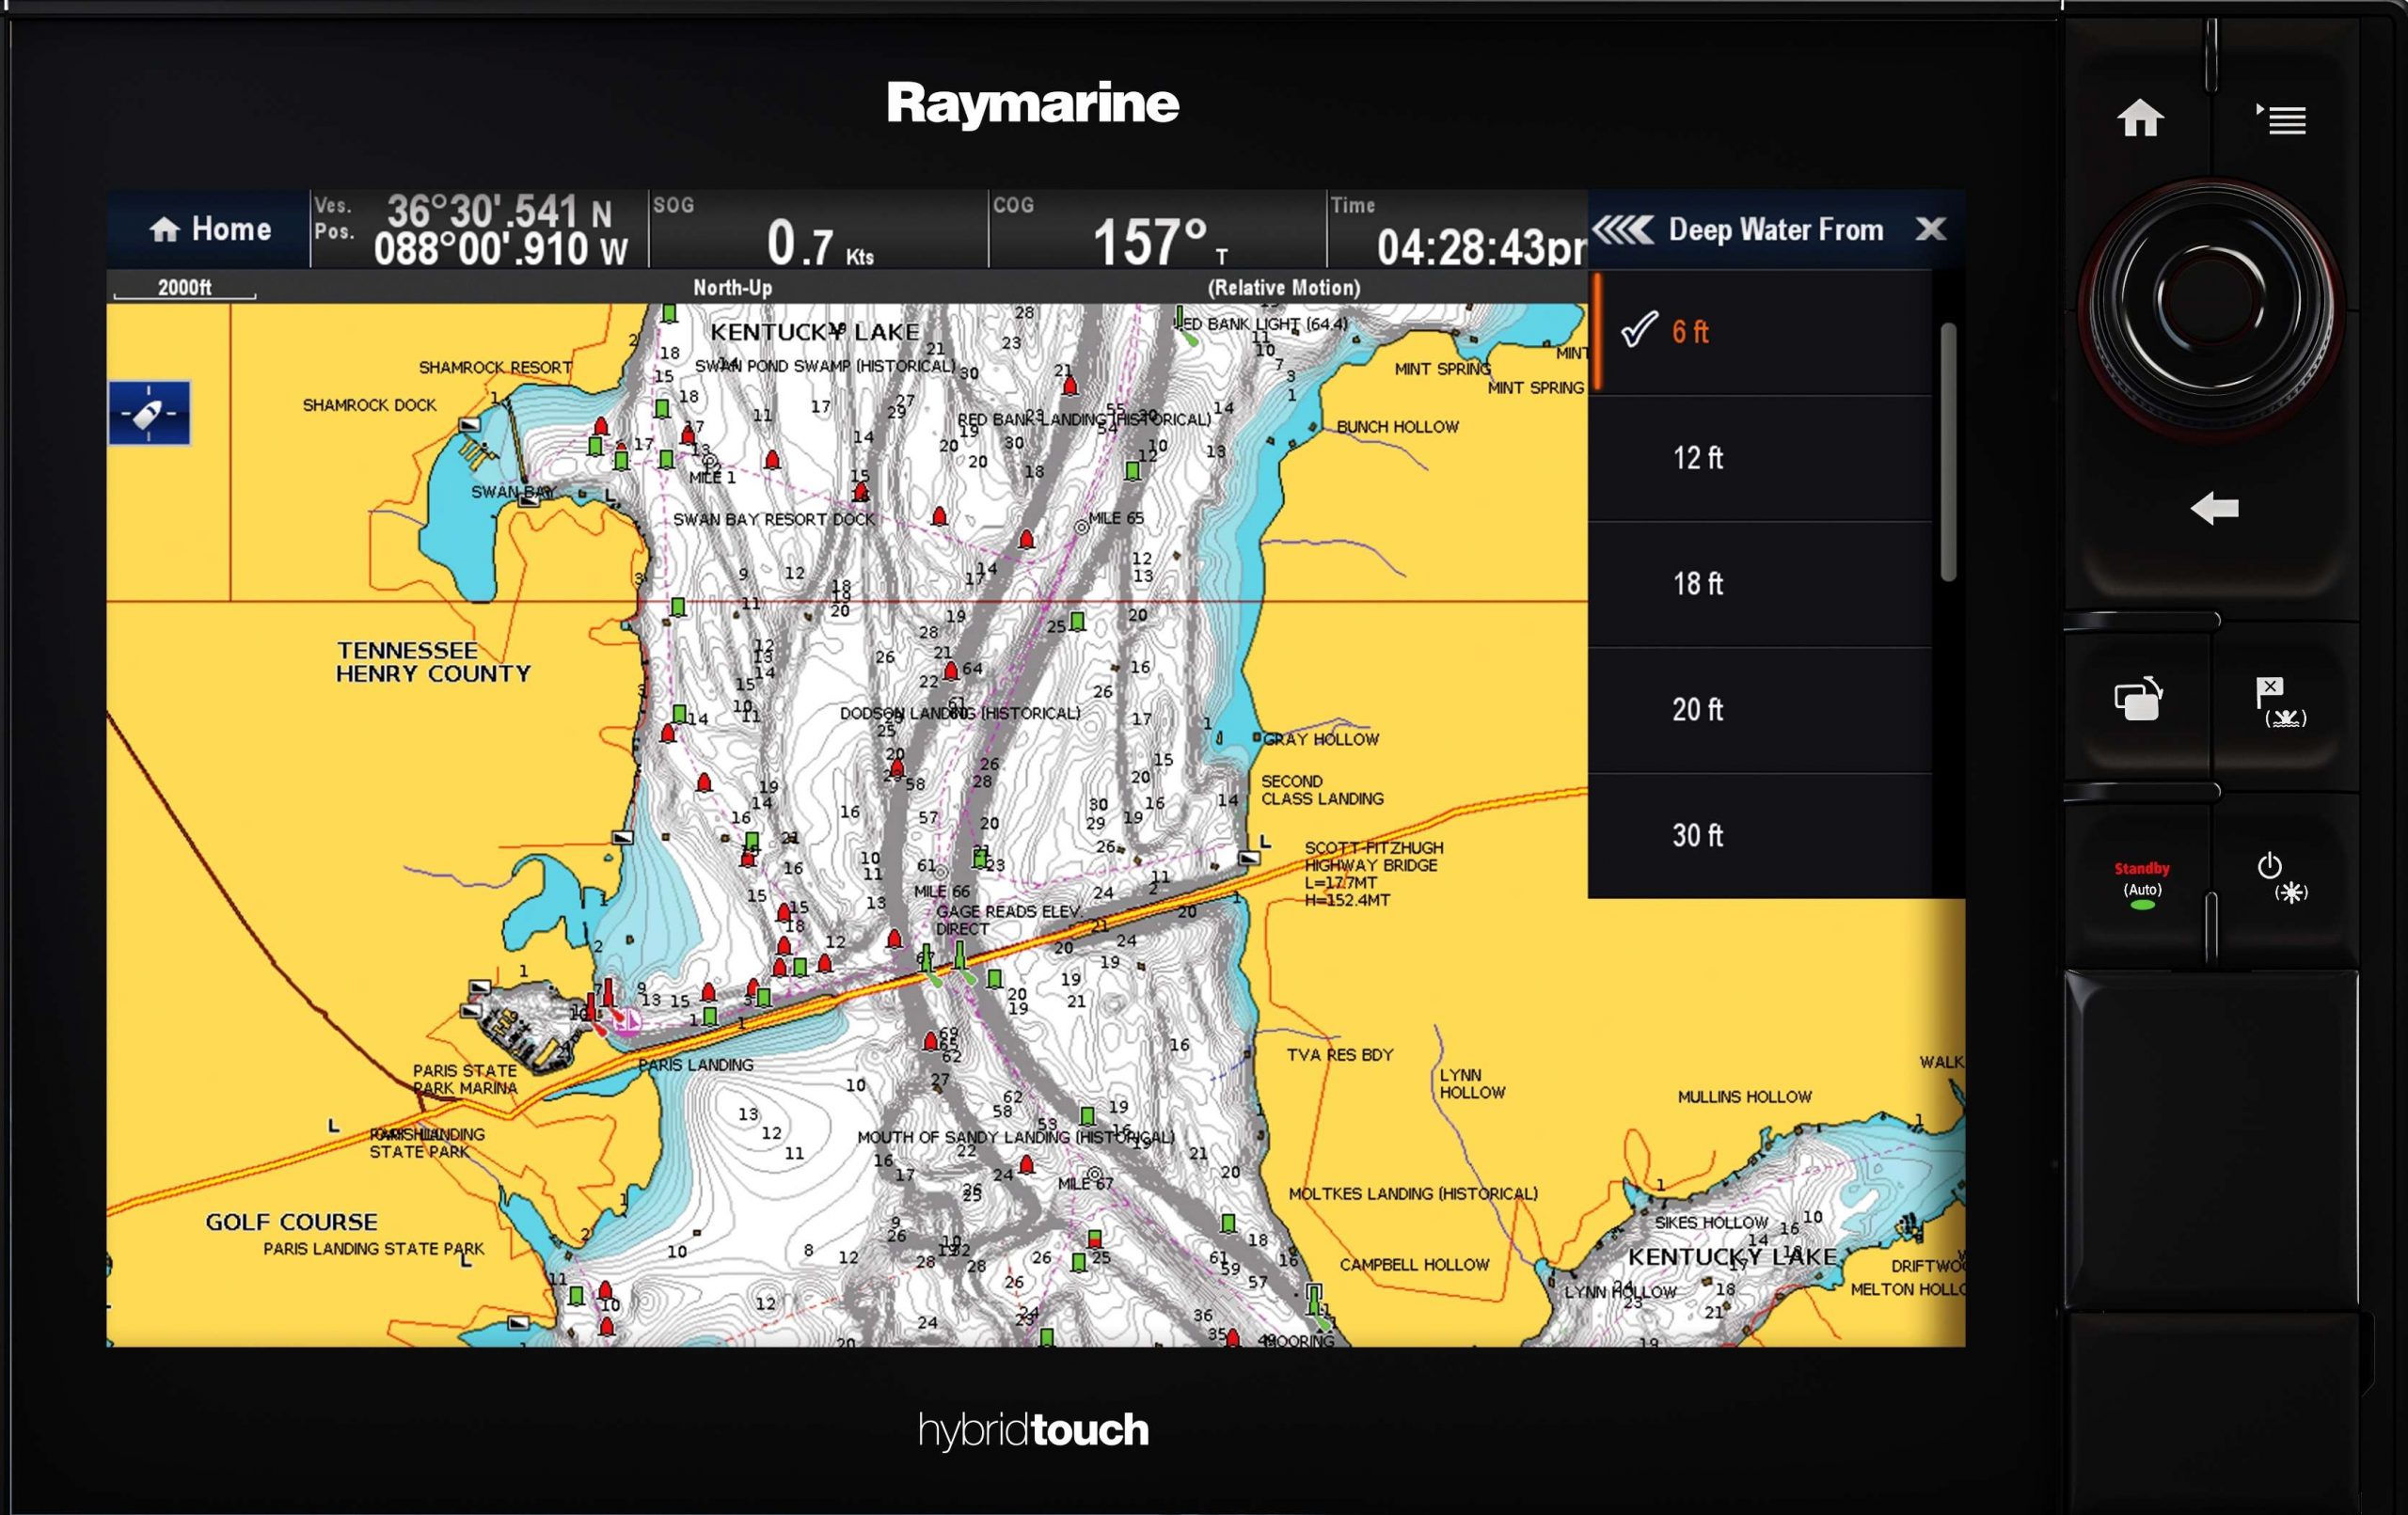
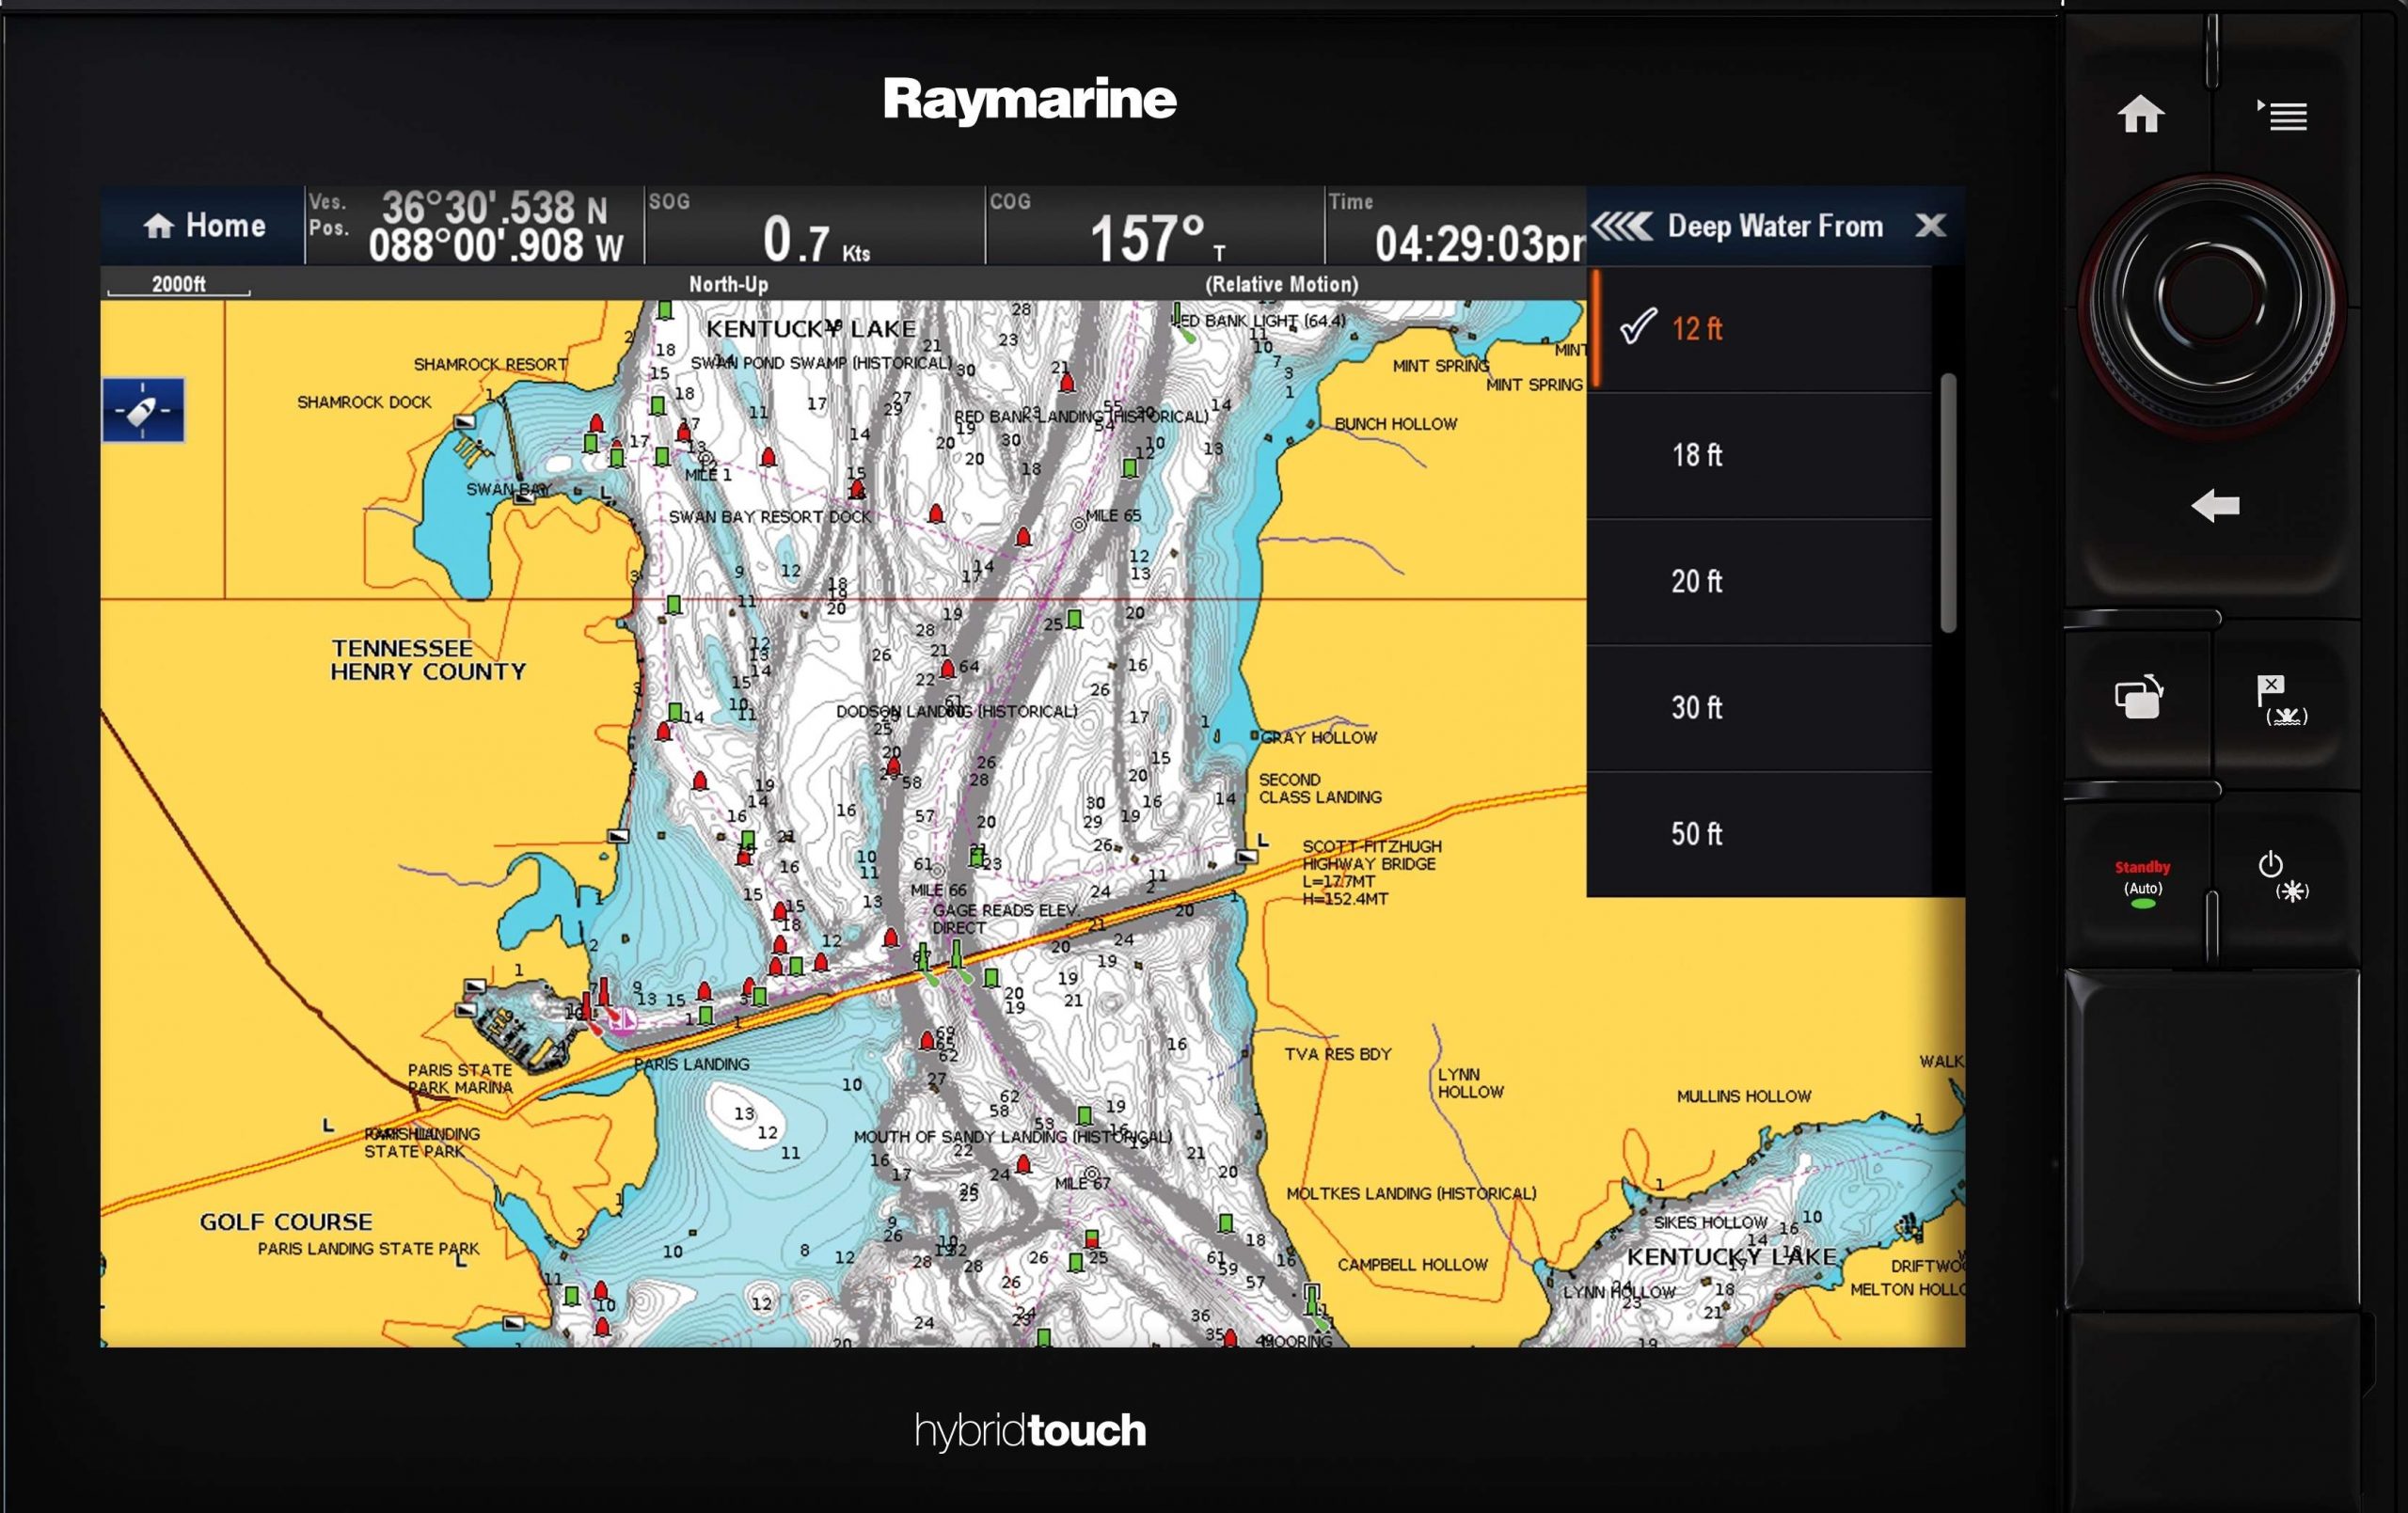
Assuming your unit is loaded with accurate mapping of the lake or river you’re fishing, there should be an option for changing the tonal value of the chart — where blue meets white. That is, it should enable you to highlight a certain depth and/or contour with color (usually shades of blue) to denote specific depth changes.
As seen in the first diagram, everything at 6 feet or less appears as a shade of blue. The shallower you look, the darker the tint of blue. So, if you find fish holding at a depth of 6 feet along a drop off, your electronics can help you expedite the search to other productive areas where that specific contour is highlighted.
If the fish are deeper — say 12 feet — then you can adjust the color scale to target that depth range, and so on. Diagrams 2 and 3 show examples of the same Navionics chart for Kentucky Lake, but feature different designations for contour shading — one at 12 feet, the other at 18 feet.
By following a contour highlighted with color, you can spend your time looking for cover and/or key features related to that specific depth zone, rather than searching aimlessly up and down the drop. It makes the search a whole lot simpler and way less time-consuming.
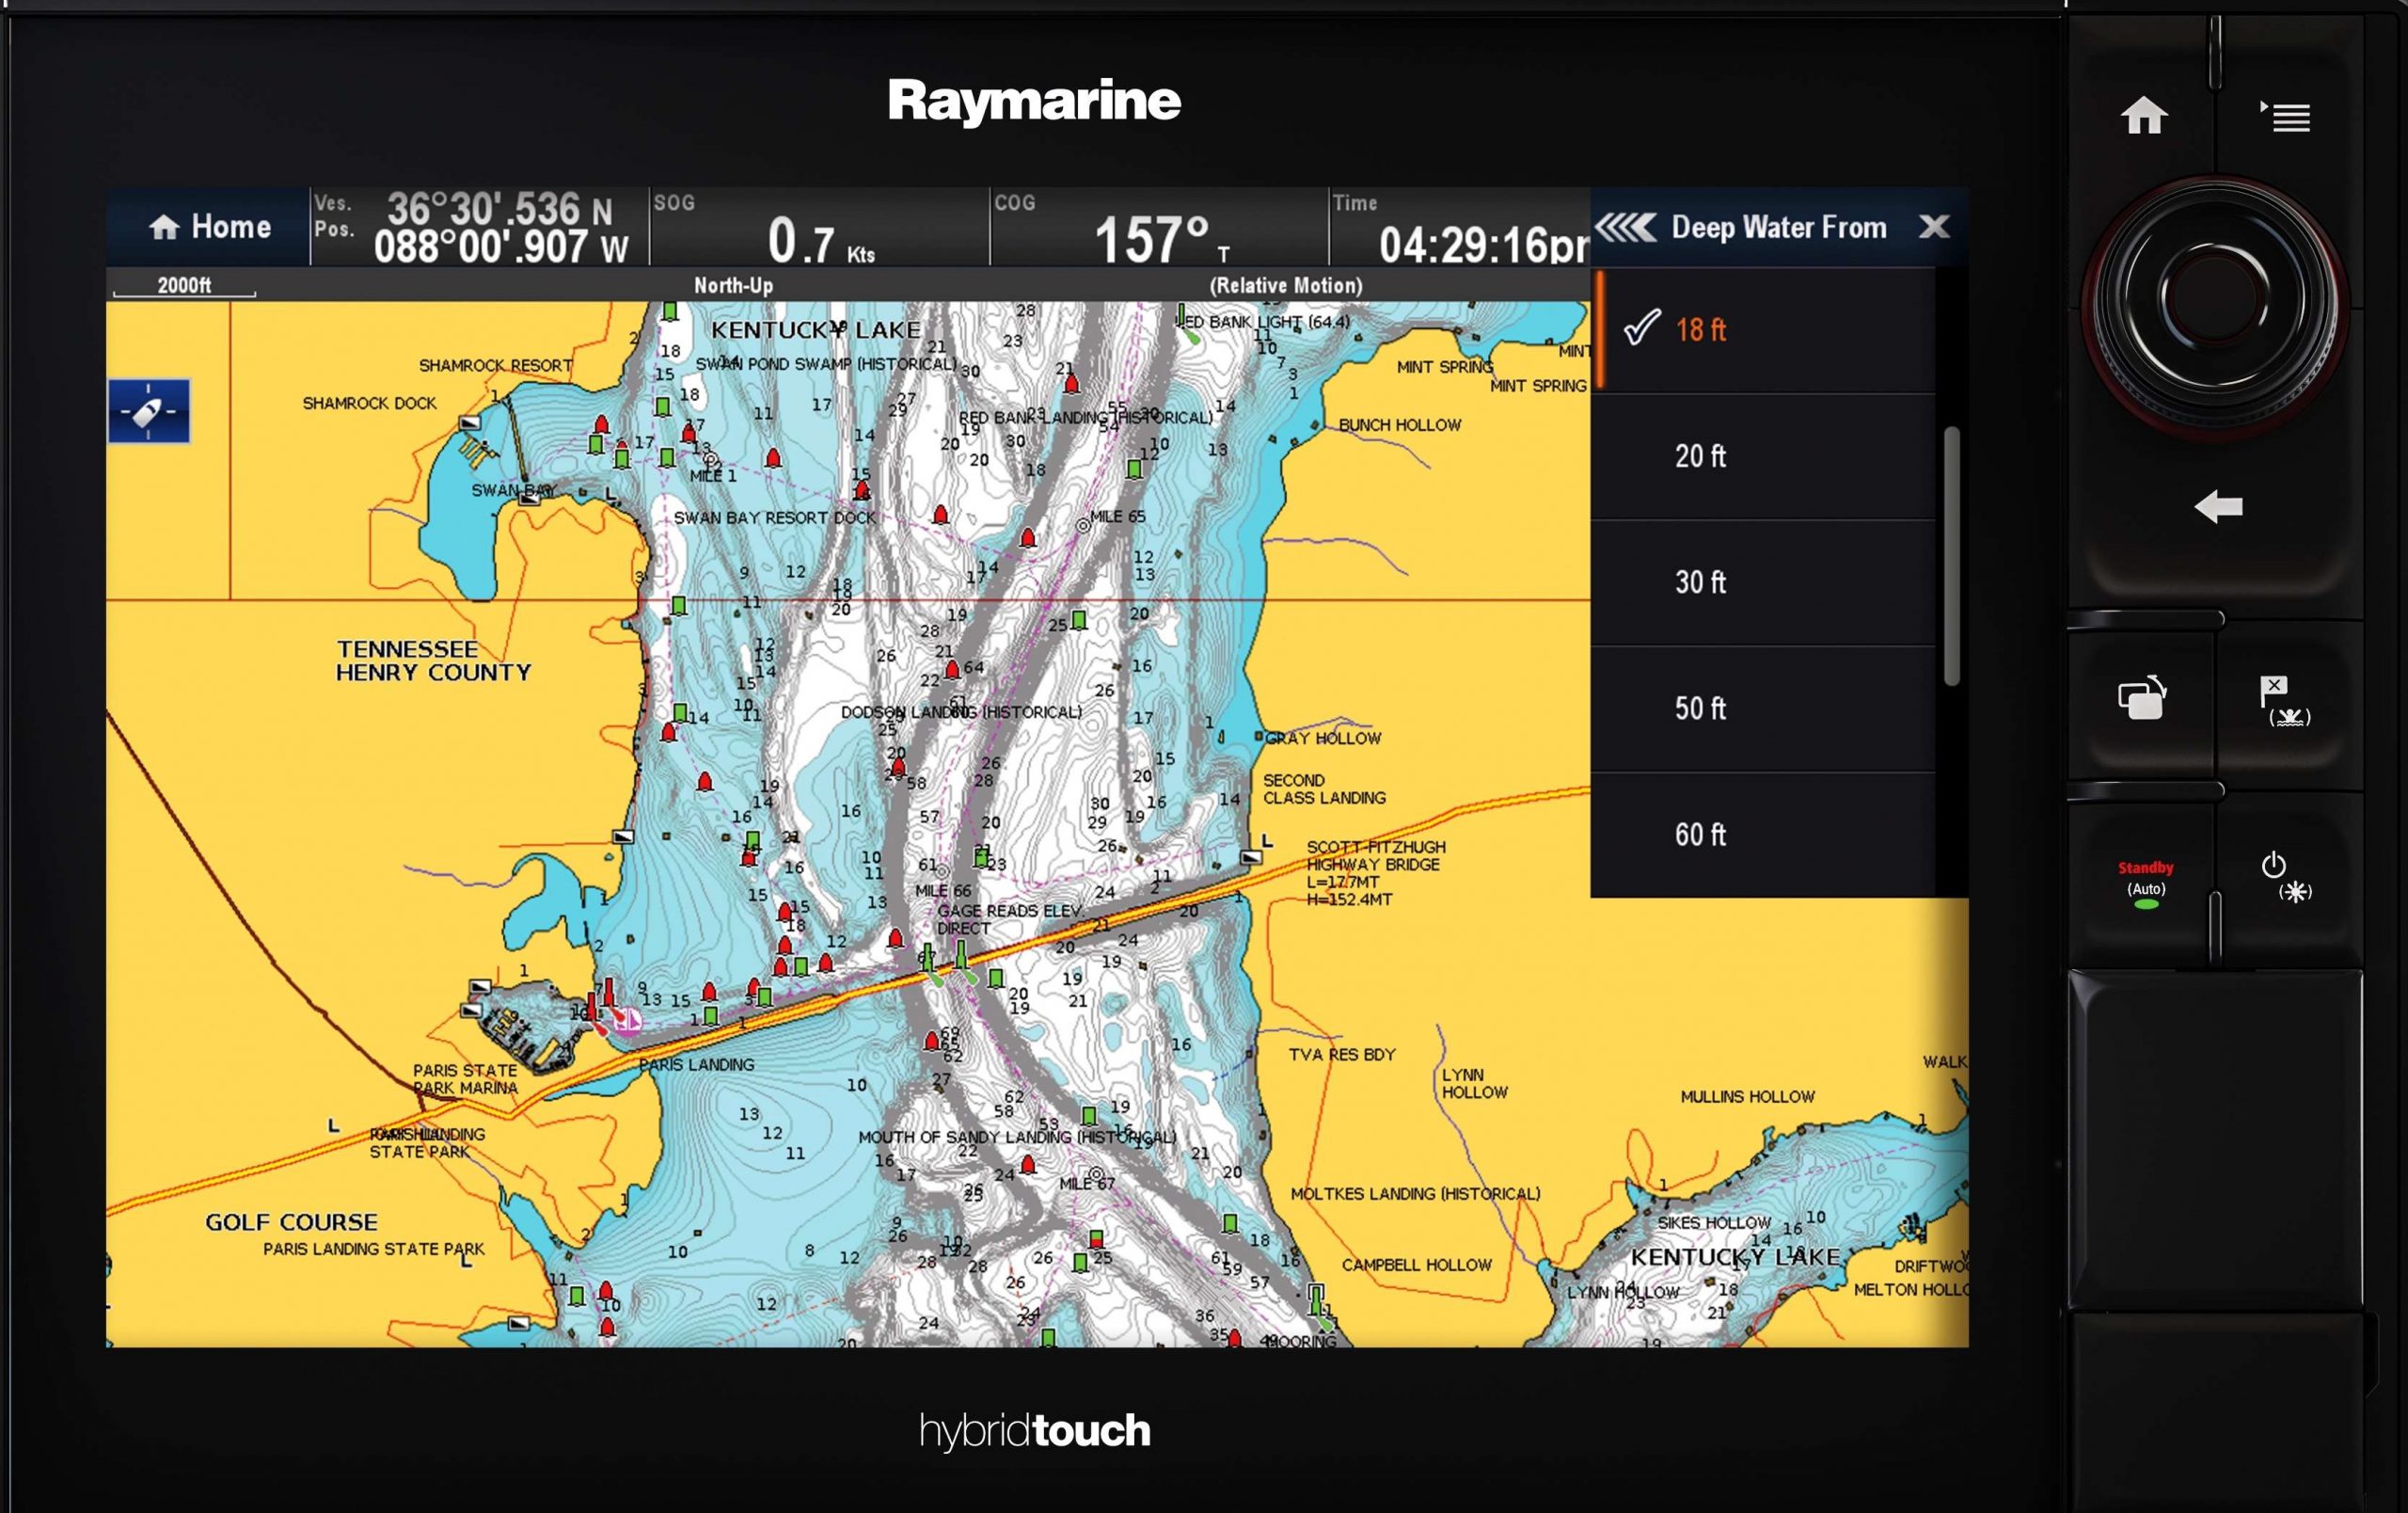
Punching the Numbers
I use Raymarine electronics, which have a fairly common approach to changing the color scale. By tapping the “Menu” tab, a small window will open where I then press “Presentation.”
The next step is to touch on “Depth & Contours” then choose something from the list that includes options of 6 feet, 12 feet, 18 feet, 20 feet, 30 feet and so on. Once I make a selection, the chart automatically updates. Then I simply hit “X” to close out the window.*
Your brand of electronics may be somewhat different, but I bet the commands and prompts are similar.
Learn the steps to changing your contour colors and I promise you’ll catch more fish. At the very least, you’ll spend less time searching for them.
*To see how the steps above appear on a Raymarine unit, follow this link.