The array of plastics on the market these days is almost endless. They all have one thing in common, however. They’re made for a mass market. Sometimes we want something designed for our specific lake or river, or maybe we just want something that’s a little different. A bait that’s a little different can make a big difference in results.
One way to do that is to modify your plastics. It’s fast and inexpensive. When I modify a soft plastic, I’m looking to change the profile or the action slightly to get a precise result. Here are a couple of ways I do it, and one way I rehabilitate my plastics.
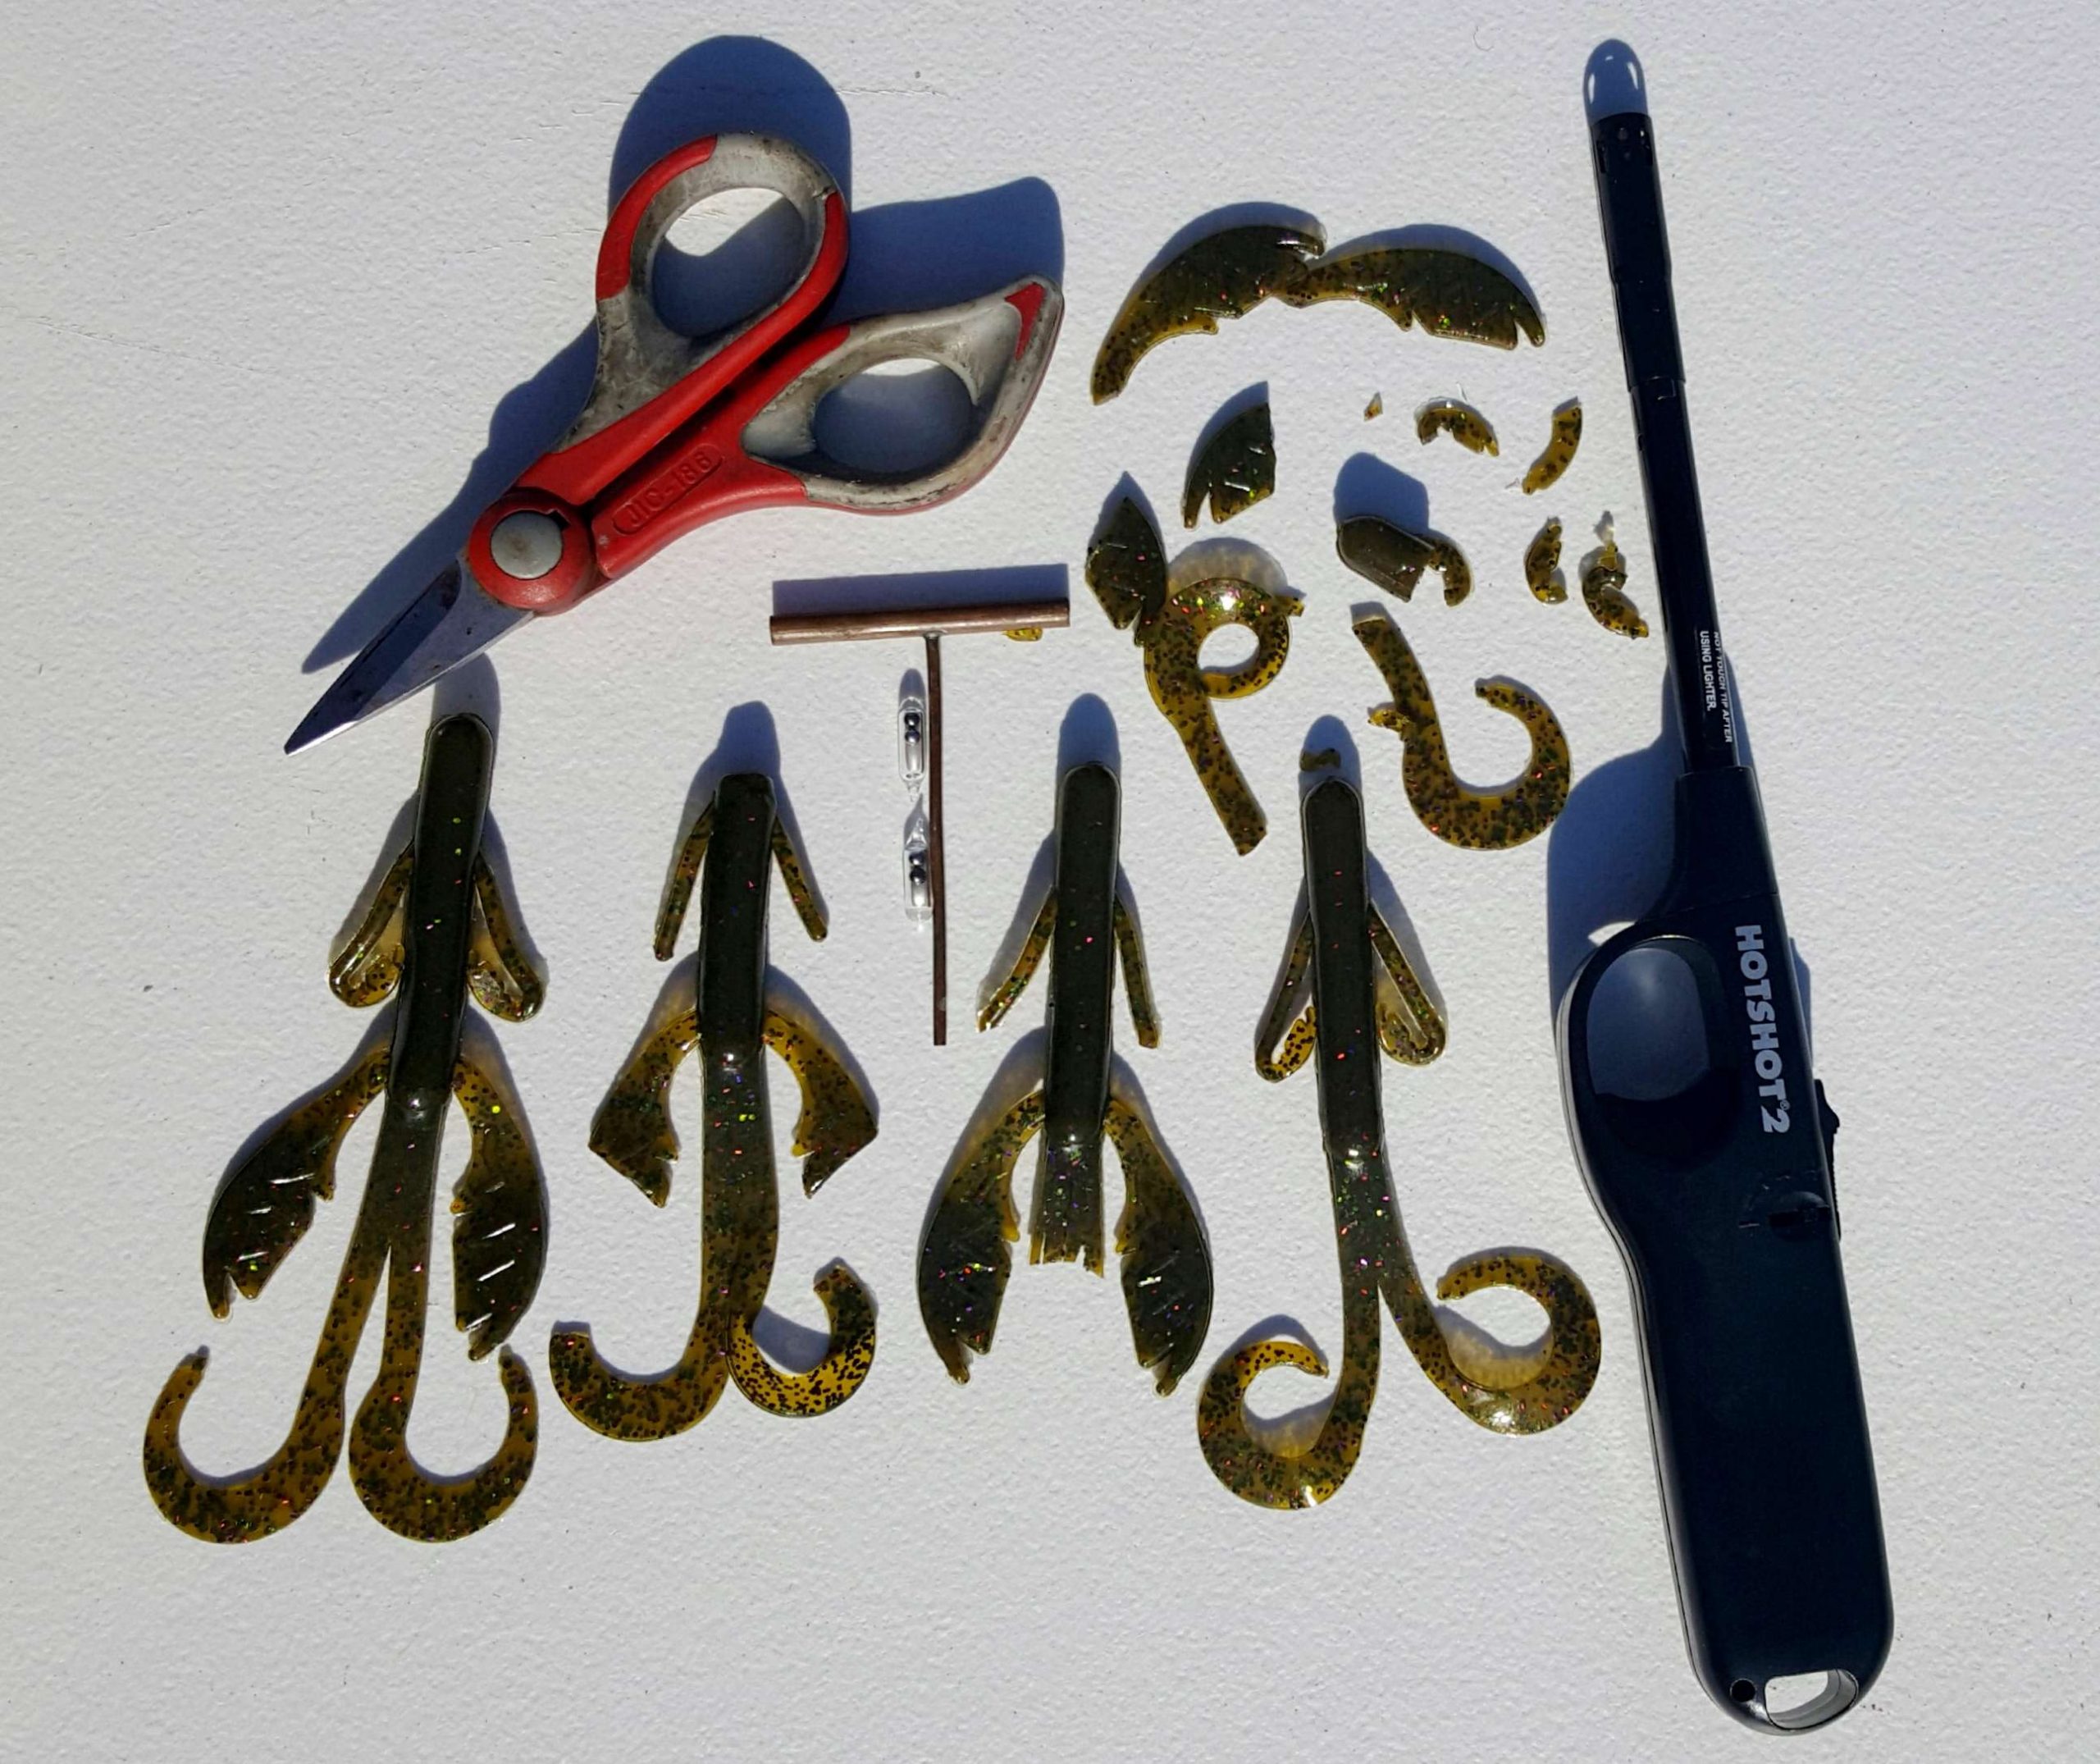
Trim ‘em
One of the easiest ways to customize your plastic baits is to use a single edge razorblade and a pair of scissors. Let’s look at a NetBait Paca Craw for a minute. It ranges in size from 3 inches to 5 inches and has a solid nose, a hollow body and big claws.
Take whatever size you want and start trimming. The claws are curved but they don’t have to stay that way. Trim them down to small, short appendages — straight or follow the outside curve — and you’ll have a much smaller profile and a tighter action.
If you’re a detail angler, you can take a windproof lighter, heat the edges where you cut and make them as smooth as the original edges.
Another bait to try this with is their Mad Paca. It’s great out of the package. It has claws and tails with a solid body. But, by simply trimming one or the other you can quickly change both the profile and the action if desired. And, you can make it as short as you want. Just snip off the end.
I’m using NetBait products in my examples because they’re the ones I know the best. You can do the same thing with any plastic bait on the market. I don’t care who makes it.
Stick ‘em together
I do this a lot more than you might think. Take a windproof lighter and heat the ends of pieces of plastic you’ve taken from a variety of lures until they’re soft and gooey. Then stick them together. They’ll stay together better than you might think. Touch up imperfections with a little glue.
You don’t have to use parts from the same company’s products. This is about your imagination and your creativity. By testing in an aquarium or swimming pool you’ll get a really good look at your creature. Watch closely on the fall and during the retrieve.
Boil ‘em
Most plastics are relatively inexpensive. That’s not true of the fancier swimbaits, however. They can cost a pretty penny. The problem is when they’ve been jammed in the boat or storage container for months they sometimes take on a twist, a kink or, even worse, the tail gets off center. Once that happens they will not run right.
You can fix that easier than you might think. Boil some water, drop them in it for 20 or 30 seconds and then lay them out on a paper towel to cool. They take the shape you choose. Once they cool, I sprinkle some salt on them to keep them from sticking together or to the storage bag.
The trick to fixing a boot tail is to hang it over the edge of the table. Make sure everything is perfectly square — the round part of the tail should hang down perfectly straight and the boot should be at a perfect right angle to it.
Boiling will also make a plastic bait softer. We did that a lot years ago when some of the better shapes and designs were made from plastic that could have been used on an automobile tire. Now, you can boil them to get more action and movement.
Customizing and repairing plastics isn’t just for the pros. Any angler can do it.